Fabric Lakehouse Tutorial – Master Unified Data Analytics in Microsoft Fabric
Welcome to this in-depth Fabric Lakehouse Tutorial — your comprehensive guide to understanding, implementing, and mastering Microsoft Fabric’s cutting-edge Lakehouse architecture. In this guide, you’ll learn how the Fabric Lakehouse unifies data engineering, warehousing, Power BI analytics, and machine learning on a single platform with OneLake storage. From data ingestion and transformation to optimization and governance, this tutorial covers every crucial facet of Fabric’s unified analytics experience.
Table of Contents
- Introduction to Fabric Lakehouse Tutorial
- Fabric Lakehouse Architecture Explained
- Materialized Lake Views (New in 2025)
- Latest Features and Innovations
- Top Methods to Load Data
- Data Security & Access in Lakehouse
- Fabric Lakehouse and Power BI SQL Endpoint
- Optimization, Performance & Maintenance
- Use Cases and Implementation Scenarios
- Further Learning & Resources
Introduction to Fabric Lakehouse Tutorial
The Fabric Lakehouse Tutorial provides step-by-step insights into building a next-generation data platform using Microsoft Fabric. It shows how organizations can consolidate data warehouse and data lake capabilities into a single, secure, and scalable analytics layer powered by OneLake.
Microsoft Fabric combines experiences like Data Engineering, Data Science, Power BI, and Data Factory into one analytics hub — reshaping how enterprises govern, transform, and analyze data in real time.
Fabric Lakehouse Architecture Explained
At the foundation of every Fabric Lakehouse lies the Medallion Architecture, a framework for organizing data maturity layers:
- Bronze Layer: Raw, ingested data from diverse sources.
- Silver Layer: Cleansed, standardized datasets ready for analytics.
- Gold Layer: Curated, aggregated data powering BI dashboards.
Each layer resides within OneLake, Microsoft’s unified storage layer. Data engineers can access it through code-first (Spark, Python) or no-code tools (Pipelines, Dataflows Gen2). The Lakehouse supports seamless integration between Spark notebooks and SQL endpoints for hybrid analysis.
Delta Tables and OneLake Integration
All Fabric Lakehouses store data in Delta Lake format, ensuring ACID transactions, schema evolution, and interoperability. Delta Tables make your data instantly queryable from the Fabric SQL Endpoint and Power BI Direct Lake mode — drastically improving performance and collaboration.
Materialized Lake Views (MLVs) – Simplifying Medallion Automation
The highlight of the 2025 update in this Fabric Lakehouse Tutorial is Materialized Lake Views (MLVs). These allow developers to define transformation logic with declarative SQL, while Fabric automatically materializes results as Delta tables optimized for fast querying.
MLV Advantages
- Declarative Refreshing: Simplify ETL by defining refresh logic through SQL views.
- Auto Dependency Tracking: Fabric tracks table dependencies, refreshing only what’s changed.
- Performance Boost: Incremental refresh ensures efficiency at scale.
- Multi-Engine Access: Queries can be run simultaneously via Spark, SQL, or Power BI.
Example SQL command:
CREATE MATERIALIZED LAKE VIEW gold.sales_summary AS
SELECT region, SUM(sales_amount) AS total_sales, COUNT(*) AS txn_count
FROM silver.transactions
GROUP BY region;
This automatically generates a Delta Lake table, integrates lineage into Purview, and refreshes periodically without manual orchestration.
For deeper integration patterns, visit Materialized Lake Views Documentation.
Newest Features in the Fabric Lakehouse (2025)
- OneLake Security Model: Fine-grained, role-based permissions integrated with Microsoft Entra ID.
- Git Integration: Full version control for Lakehouse schemas through Deployment Pipelines.
- Livy REST API: Execute Spark code remotely without opening notebooks.
- OneLake for Excel: Fabric datasets now available directly within Excel’s Get Data pane.
- Enhanced Power BI Direct Lake: Real-time visual refresh with zero data duplication.
Best Methods to Load Data into Fabric Lakehouse
Data ingestion is central to this Fabric Lakehouse Tutorial. There are multiple methods to bring data into your Lakehouse:
1. Data Pipelines (ETL & ELT)
Fabric Pipelines handle batch and scheduled ingestion through visual or code-based workflows. You can copy data incrementally from SQL, Blob Storage, or SaaS applications using bookmarks for high efficiency.
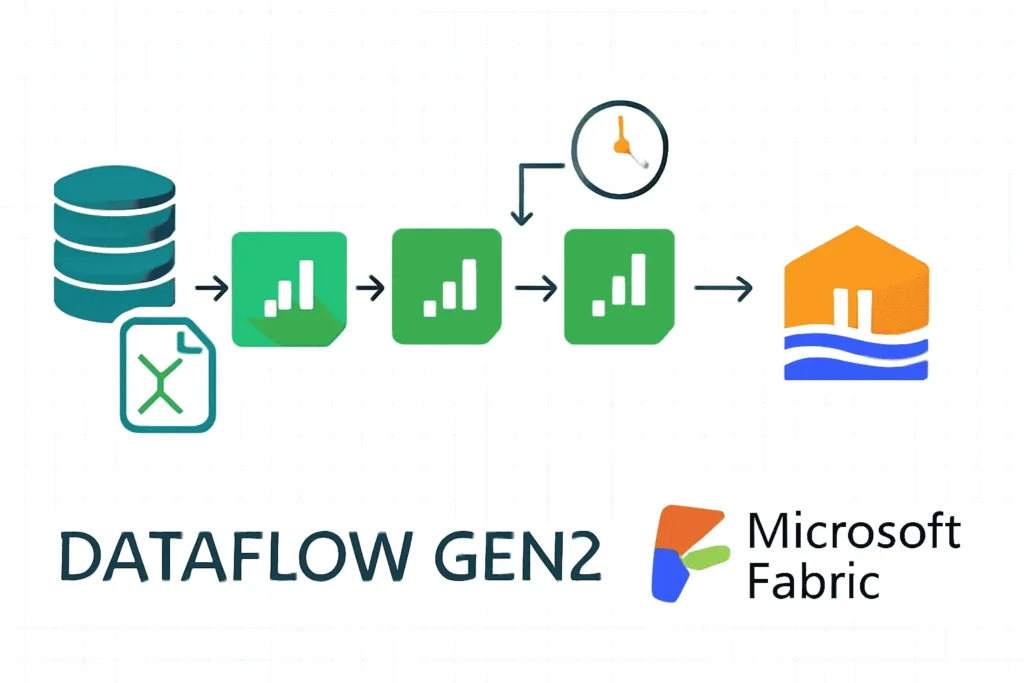
2. Dataflows Gen2 (No-Code Approach)
Perfect for citizen data analysts. Use Power Query’s drag-and-drop interface to connect to 200+ sources. Explore our related post: Dataflow Gen2 in Fabric – Tutorial Series.
3. Spark-Based Script Ingestion
df = spark.read.format("parquet").load("/mnt/raw/sales_data/")
df.write.format("delta").mode("overwrite").save("/lakehouse/bronze/sales/")
4. Eventstream for Real-Time Data
Fabric Eventstream ingests streaming data (IoT, Kafka, Event Hubs) directly into Lakehouse tables, ensuring near-instant availability for dashboards using Direct Lake mode.
5. Incremental Copy from Fabric Warehouse
Transfer only updated records between Data Warehouse and Lakehouse layers to optimize refresh cycles. See details: Incremental Copy Tutorial.
Data Security and Access Control
Data protection forms the backbone of this Fabric Lakehouse Tutorial. Microsoft Fabric’s layered security features ensure privacy, compliance, and enterprise-grade protection.
Security Features Inside Lakehouse
- RBAC & Workspace Roles: Manage ownership, contributor, and viewer access.
- Row-Level and Column Security: Filter data visibility for Power BI users dynamically.
- Encryption: Data encrypted at rest (AES-256) and in transit (TLS 1.3).
- Purview Integration: Automatic lineage detection and policy management.
Learn more via Microsoft Fabric Security Overview.
Connecting Fabric Lakehouse to Power BI and SQL Endpoint
Every Lakehouse created in Fabric includes a **SQL Endpoint**, allowing immediate querying via T-SQL. Power BI’s **Direct Lake Mode** uses this endpoint for accelerated, import-free reporting.
SQL Endpoint Query Example
SELECT product_name, SUM(revenue) AS total_revenue
FROM gold.sales_data
GROUP BY product_name
ORDER BY total_revenue DESC;
Access Methods
- Connect Power BI Desktop using “Microsoft Fabric (Direct Lake)”.
- Use Azure Data Studio, ODBC, or JDBC connections with Microsoft Entra credentials.
- Integrate with Excel using the OneLake connection option.
Optimization & Maintenance Best Practices
- Regularly run
OPTIMIZEto compact small Delta files andVACUUMto clean up obsolete data. - Partition tables by date or key attributes for faster lookups.
- Leverage MLVs for pre-aggregating heavy computation queries.
- Use Fabric Capacity Metrics to monitor Spark performance and resource utilization.
Fabric Lakehouse Tutorial – Practical Use Cases
Enterprises across industries use Microsoft Fabric Lakehouse for unified analytics:
- Retail Analytics: Unify POS, supply chain, and web sales in a single gold dataset for real-time KPIs.
- Finance & Banking: Reduce reconciliation time by automating pipeline refreshes and RLS-enforced dashboards.
- Healthcare: Stream patient insights securely with Purview governance and real-time event ingestion.
- Manufacturing: Build ML-driven quality insights by merging IoT and ERP datasets inside Lakehouse architecture.


