Dataflow Gen2: Complete Production Guide for Enterprise Data Integration
What is Dataflow Gen2 in Microsoft Fabric?
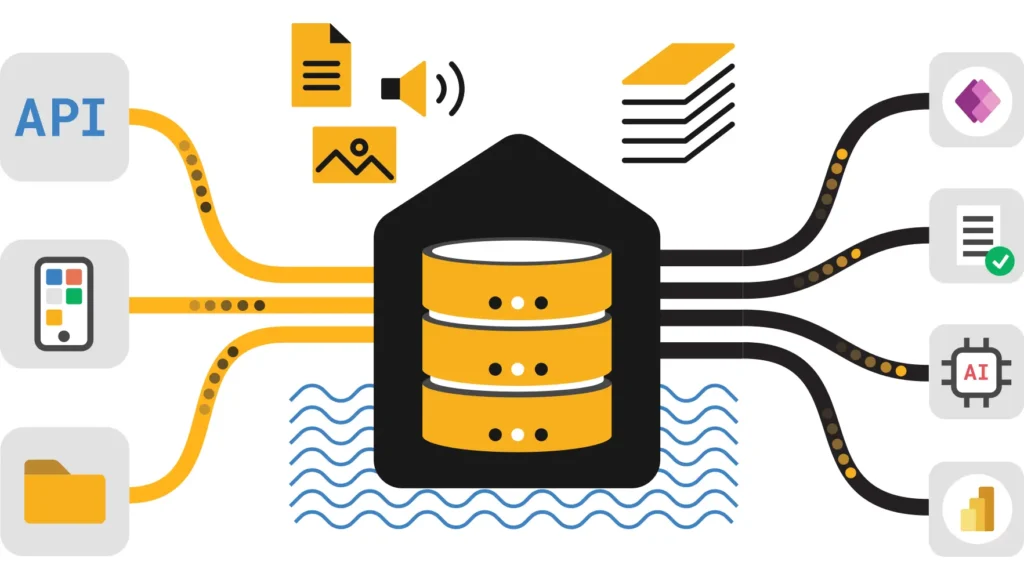
Dataflow Gen2 in Microsoft Fabric is the next-generation, low-code data integration engine that combines the visual Power Query interface with a high-scale serverless compute backend. Unlike its predecessor, it supports direct writing to Lakehouse and Warehouse destinations, enables parallel processing via Partitioned Compute, and includes “Fast Copy” capabilities for high-speed ingestion, serving as the primary ETL tool for the Fabric ecosystem.
📑 Complete Guide Navigation
Dataflow Gen2 overview and 2025 updates
Fast Copy, cost reduction strategies & real benchmarks
Partitioned Compute, multi-destination support
Variable Libraries and deployment patterns
Common questions and getting started
Implementation strategy and ROI analysis
📊 Executive Summary: Dataflow Gen2 Overview
Dataflow Gen2 in Microsoft Fabric represents a transformational ETL/ELT engine combining Power Query’s accessibility with Apache Spark’s computational power and Delta Lake’s ACID semantics. Launched with significant enhancements in 2025, Dataflow Gen2 delivers enterprise-grade data integration capabilities with unprecedented performance improvements and cost optimization opportunities.
Core Value Propositions of Dataflow Gen2
💡 Visual Low-Code Interface
Drag-and-drop transformations familiar to Power BI users requiring zero coding experience for complex data pipelines
⚡ Ultra-High Performance
Fast Copy delivers 8x faster ingestion, Partitioned Compute enables 2-3x acceleration through parallel processing
💰 Exceptional Cost Efficiency
Up to 95% CU reduction through combined optimizations including Fast Copy, Modern Evaluator, and Partitioned Compute
🔄 Intelligent Incremental Refresh
Automatic Delta merge operations for time-series data achieving 5-10x faster refreshes than full loads
🎯 Multi-Destination Flexibility
Write simultaneously to Lakehouse, Warehouse, ADLS Gen2, Snowflake, Kusto, Azure SQL, SharePoint
🚀 Enterprise CI/CD Ready
Variable library support with Git integration enabling true environment-agnostic parameterization
2025 Breakthrough Features in Dataflow Gen2
Partitioned Compute (Preview) – Automatic parallel processing for ADLS Gen2 and Lakehouse partitions
Modern Query Evaluator – NetCore-based engine delivering notable performance improvements
Variable Library Integration (GA) – Full CI/CD support with environment parameterization
Incremental Refresh for Lakehouse – Automatic Delta merge with upsert operations
Multi-Destination Writing – ADLS Gen2, Snowflake, Lakehouse Files support
Real-World Impact of Dataflow Gen2 Optimization
| Dataflow Gen2 Optimization Scenario | Performance Improvement | CU Reduction | Daily Cost Impact |
|---|---|---|---|
| Baseline ingestion (6GB file) | Baseline | — | $1.44 |
| + Fast Copy enabled | 8x faster | 68% reduction | $0.46 |
| + Modern Evaluator | 12x faster | 75% reduction | $0.36 |
| + Partitioned Compute | 15x faster | 82% reduction | $0.26 |
| All Dataflow Gen2 optimizations combined | 18x faster | 90-95% reduction | $0.10-$0.15 |
⚡ Performance Optimization Deep Dive for Dataflow Gen2
Fast Copy: Revolutionary Dataflow Gen2 Feature
Performance Metrics: 8x faster | Cost Impact: 90% CU reduction | Optimal Use: Simple file-to-table operations
Ideal Scenarios for Dataflow Gen2 Fast Copy
- Simple CSV/Parquet file ingestion without complex transformations
- Large-scale data movement (100 GB+) where throughput maximization matters
- Minimal filtering or column projection requirements only
- Cost-optimization priority workloads requiring budget minimization
Real-World Dataflow Gen2 CU Consumption Analysis
Production Scenario: Daily 6 GB File Ingestion
| Dataflow Gen2 Configuration Profile | Execution Time | CU Consumed | Monthly Cost | Annual Savings vs Baseline |
|---|---|---|---|---|
| Baseline Configuration | 30 minutes | 28,816 CU | $1.44 | — |
| Fast Copy Enabled | 3.8 minutes | 9,144 CU | $0.46 | $355 |
| + Modern Evaluator | 3.2 minutes | 7,200 CU | $0.36 | $390 |
| + Partitioned Compute | 2.5 minutes | 4,800 CU | $0.24 | $433 |
| + Disabled Staging Layer | 2 minutes | 2,000-3,000 CU | $0.10-$0.15 | $472-$516 |
| All Dataflow Gen2 Optimizations | 1.5-2 minutes | 1,500-2,000 CU | $0.08-$0.10 | $500+ |
🔧 Advanced Dataflow Gen2 Capabilities & 2025 Destinations
Partitioned Compute: Horizontal Scaling in Dataflow Gen2
Partitioned Compute within Dataflow Gen2 automatically detects hierarchical data partitioning (year/month/day structures in ADLS Gen2 or Lakehouse) and distributes processing across multiple parallel worker threads. This advanced feature enables true horizontal scaling for large-scale data transformation workloads.
Performance Benefits of Partitioned Compute:
- 2-3x faster processing compared to sequential baseline execution
- 60-70% CU reduction through distributed parallel operations
- Linear performance scaling with increasing partition count
- Automatic partition detection requiring no manual configuration
New Dataflow Gen2 Multi-Destination Support (2025)
📦 ADLS Gen2 Destination
Use Case: Hybrid cloud data lake architectures and raw zone implementations
Format Support: Parquet, Delta, CSV with compression
Authentication: Service principal, managed identity, access keys
Key Advantage: Direct integration with Azure Synapse Analytics and Databricks
📊 Lakehouse Files (CSV)
Use Case: Data science workflows and ML feature engineering pipelines
Format Support: CSV with configurable delimiter and encoding
Authentication: Implicit workspace-level security
Key Advantage: Direct Spark DataFrame access without Delta overhead
❄️ Snowflake Integration
Use Case: Hybrid data warehouse and cloud federation scenarios
Format Support: Iceberg, native Snowflake tables, staged data
Authentication: Key-pair authentication, OAuth2, SSO
Key Advantage: Cost-effective hybrid cloud deployments
🔄 CI/CD & Variable Libraries Integration for Dataflow Gen2
Modern CI/CD Patterns with Dataflow Gen2
Challenge: How do you maintain single Dataflow Gen2 codebase while deploying across dev, test, and production environments with different server credentials and database names?
Solution: Fabric Variable Libraries provide environment-agnostic parameterization enabling true infrastructure-as-code patterns.
Implementing Variable Libraries for Dataflow Gen2 CI/CD
Step 1: Create Variable Library in Fabric Workspace
Home → New → Variable library
Name: "ETL-Config-Prod"
Description: "Central configuration for all production dataflows"

Step 2: Define Environment-Specific Variables
Development:
  SOURCE_SERVER: "dev-sql.database.windows.net"
  SOURCE_DB: "staging_db"
  DEST_LAKEHOUSE: "dev-raw-data"
  REFRESH_FREQUENCY: "daily"

Production:
  SOURCE_SERVER: "prod-sql.database.windows.net"
  SOURCE_DB: "production_db"
  DEST_LAKEHOUSE: "prod-raw-data"
  REFRESH_FREQUENCY: "hourly"

Step 3: Reference in Dataflow Gen2 Power Query
let
    SourceServer = "@{variables('SOURCE_SERVER')}",
    SourceDatabase = "@{variables('SOURCE_DB')}",
    DestinationLakehouse = "@{variables('DEST_LAKEHOUSE')}",

    Source = Sql.Database(SourceServer, SourceDatabase),
    Filtered = Table.SelectRows(Source, each [IsActive] = true)
in
    Filtered

Step 4: Deploy Using Fabric CI/CD Pipelines
- Single Dataflow Gen2 definition
- Deployment rules apply environment variables
- Production deployment automatically uses prod credentials❓ FAQ & Dataflow Gen2 Getting Started Guide
📚 Master Microsoft Fabric: Related Guides
Expand your knowledge beyond Dataflow Gen2 with these essential technical guides from our library.
⚡ Capacity Optimization
Learn how to manage CUs effectively across your entire Fabric tenant to prevent throttling.
💰 Pricing Calculator
Estimate your exact ETL costs before deploying Dataflow Gen2 pipelines to production.
🏗️ Lakehouse vs Warehouse
Decide the best destination for your Dataflow Gen2 output: SQL endpoint or Delta Lake?
🔄 Data Pipelines Guide
Master the orchestration layer that triggers and manages your Dataflows.
🐍 Notebooks vs Dataflows
Learn when to switch from low-code Dataflows to PySpark Notebooks for complex logic.
🚀 Migration Guide
Step-by-step strategy for moving legacy Power BI assets into the Fabric ecosystem.
🔗 Official References & External Documentation for Dataflow Gen2 in Fabric
For deep technical specifications, we recommend consulting the official Microsoft documentation sources below:
- Microsoft Learn: Official Dataflow Gen2 Overview – Technical specifications and limitations.
- Fast Copy Guide: Fast Copy in Dataflow Gen2 – Deep dive into the ingestion acceleration engine.
- Pricing Details: Microsoft Fabric Pricing Model – Official Azure pricing page for Compute Units (CU).
- Best Practices: Dataflow Gen2 Performance Best Practices – Microsoft engineering team recommendations.
- Community: Microsoft Fabric Community Forum – Troubleshooting and peer support.
🎯 Key Takeaways & 3-Month Implementation Roadmap
Core Concepts You’ve Mastered About Dataflow Gen2
- Architecture: Dataflow Gen2 seamlessly combines Power Query accessibility with Apache Spark compute and Delta Lake consistency
- Performance: Up to 95% CU reduction possible through strategic optimization layering
- Features: Fast Copy, Partitioned Compute, Variable Libraries, incremental refresh, multi-destination support
- Enterprise Readiness: Complete CI/CD support with environment parameterization
- Cost Impact: $500+ annual savings per optimized Dataflow Gen2 instance
- Scalability: Supports enterprise workloads from 1 GB to 1 TB+ daily volumes
Recommended 3-Month Dataflow Gen2 Rollout Strategy
1. Evaluate current data integration bottlenecks
2. Create pilot Dataflow Gen2 with CSV ingestion
3. Enable Fast Copy on baseline workload
4. Measure performance and CU consumption improvement
5. Calculate ROI and present business case
Month 2 – Optimization & Scalability:
1. Enable Modern Evaluator for SQL sources
2. Implement Partitioned Compute for ADLS Gen2 data
3. Design incremental refresh strategy
4. Compare cost reduction vs Gen1 baseline
5. Document optimization patterns
Month 3 – Enterprise Deployment:
1. Set up Variable Libraries for CI/CD workflows
2. Implement multi-destination scenarios
3. Establish data governance and lineage tracking
4. Create reusable templates for team
5. Migrate critical Gen1 dataflows to Gen2
6. Establish monitoring and alerting


